Using a Canvas file image as a banner
The Canvas Collections image banner requires a URL to an image. This image can be hosted externally (e.g. on the open web), or it can be hosted in the Canvas files area of your Canvas course site.
Here's how to generate a URL for an image in your Canvas course site's files area.
1. Upload an image to your Canvas course site's files area
Use the Canvas community instructions for uploading files to upload the image.
Create a folder for all your Collections images
It can make organisation easier if you create a folder in your Canvas course site's files area to store all your Collections images.
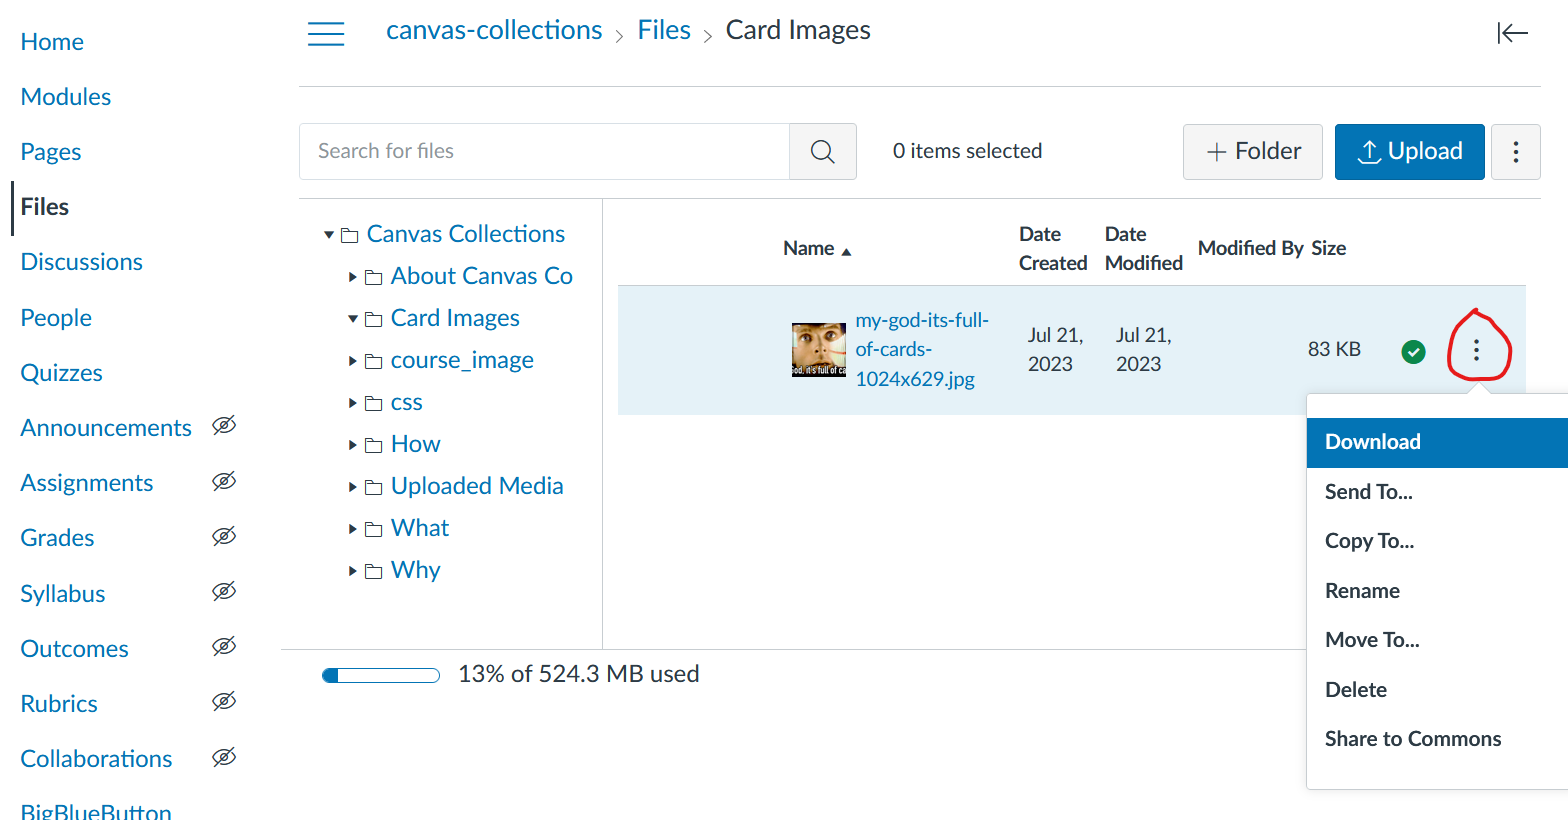
2. Click on the "three dots" menu for the uploaded image
Once the image is uploaded,
- View the folder containing the image.
- Hover your mouse over the specific image.
- Click on the "three dots" menu that appears (see image below).
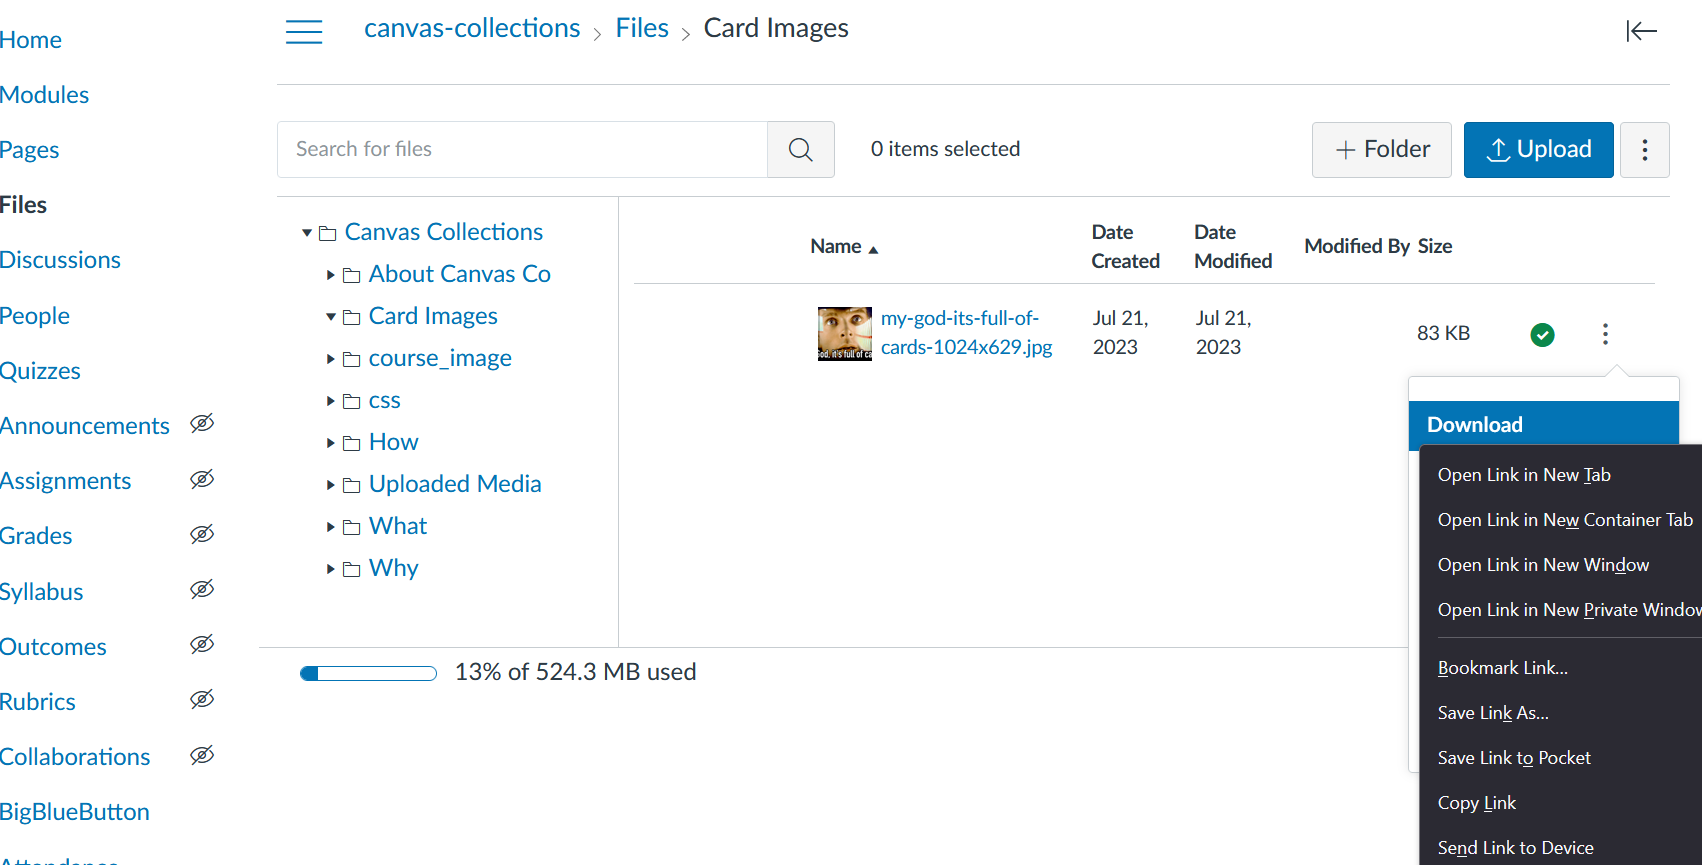
3. Copy the "download" URL for the image
Now you can obtain a download link for the image, by
- Hover over the "download" option in the "three dots" menu (see image above).
- Open your browser's contextual menu by right or ctrl clicking
- Click on the "copy link" or equivalent option in the contextual menu.
This will copy the "download" URL for the image into your computer's clipboard.
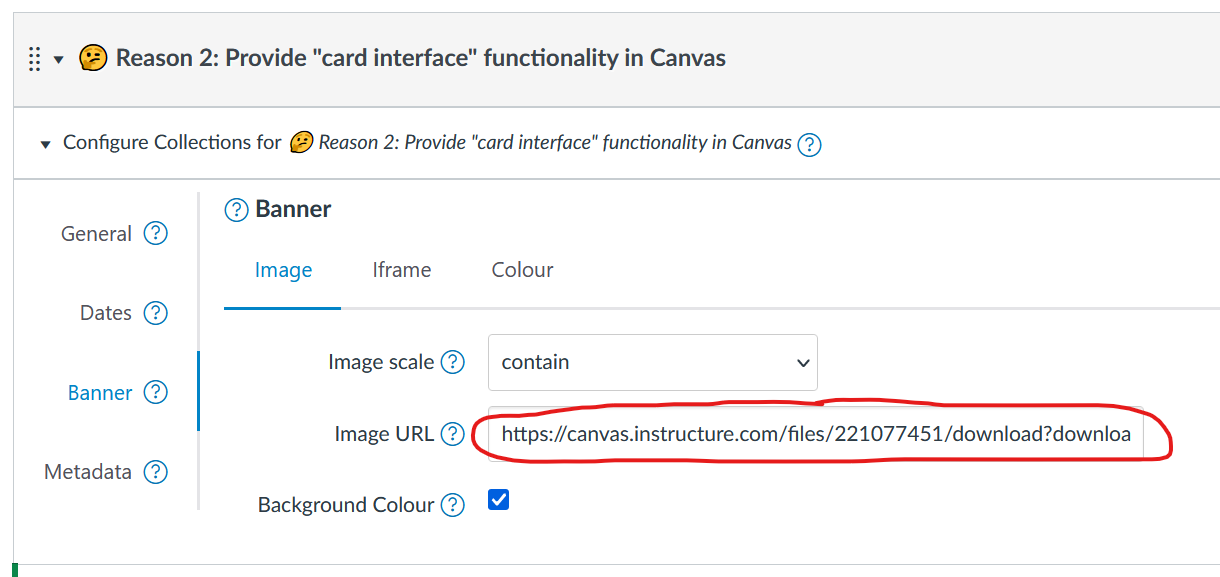
4. Paste the "download" link into the banner image URL
With Collections' "edit mode" turned on:
- Find the module configuration element.
- Open the banner tab
- Paste the "download" link into the banner image URL (see image below).